All 39 Bosses in Phantom Blade Zero, in Order
The story-order list, the 24 optional fights, and why the count is 39, 50+ or 74.
A Chapter 1 wall with two adds, a bleed bar you build by blocking, and a red sixth hit that ends runs. Here is the route in, the six tells that matter, and the weapon you walk out with.
Jagged Steel is the first boss that asks you to manage three things at once: the boss, the two masked fighters sharing his arena, and the bleed bar filling under your own health. The fight is not won by out-damaging him. It is won by keeping the arena clean, parrying the blue finisher, and refusing to trade hits in front of him while his cleaves are still swinging.
Boss order: Jagged Steel is entry 4 in our full list of all 39 bosses. He is the first Chapter 1 fight in Weeping Creek Valley, after the prologue and the carriage encounter with The Hunt.
The fight sits in Chapter 1, "Against the Flow," in Weeping Creek Valley. The path starts at the Red Thread Barrier. Until those threads are cut, the route is closed, so clear the barrier before you go looking for anything else in the canyon.
From the barrier bell, take the stairs and walk through the opened curtain of threads. Follow the stream-side canyon path. Under the rock overhang, next to a fire basket, there is a purple-robed corpse. If you look down at the body's feet, an E prompt appears and you can pick up "Captain Chen Zhu's Secret Letter," the first page of the Wulin Tales in your Books menu. It is optional, but it is easy to miss and it costs one interaction.
Keep following the canyon through the waterfall mist. The path opens into a wide stone riverbed, and ahead on the cliff sits the two-storey Rustblade Pavilion. That is the arena. When you get close to the brute on the riverbed, the health bar "JAGGED STEEL, THE FRENZIED BRUTE" appears. The nearest bell is Rustblade Pavilion, above the riverbed beside the candle-covered cross.
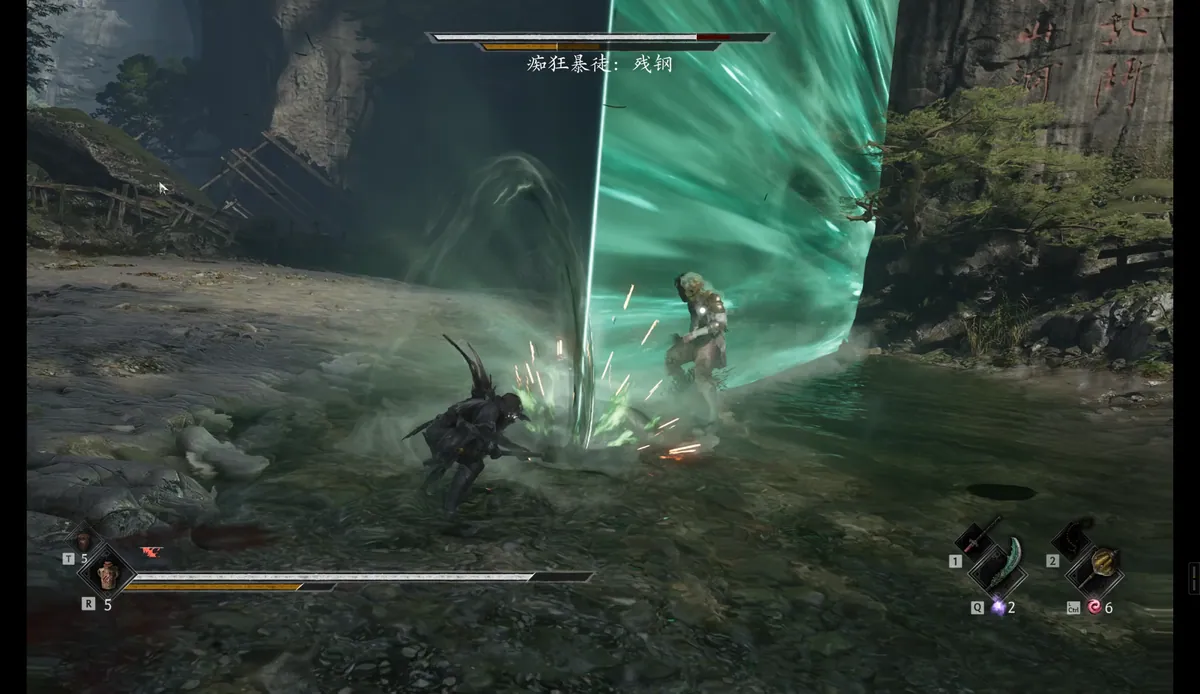
The exact distance from the Rustblade Pavilion bell to the arena is not in the sources we checked. The route above is landmark-based, so you do not need a distance to follow it. Per-attack damage numbers are also unlisted rather than estimated.
The health bar is the same one used in the boss list: "Jagged Steel, the Frenzied Brute." AllThingsHow lists him at level 2 with 8,280 HP, and separately lists a level 18 value of 69,768. The source does not say which encounter the second number belongs to, so this page treats 8,280 as the Chapter 1 fight and does not invent a second phase for the larger number.
| Detail | What the sources say |
|---|---|
| Health bar | JAGGED STEEL, THE FRENZIED BRUTE |
| Level | 2 / 18 (two entries in the same source) |
| HP (first encounter) | 8,280 |
| Second listed value | 69,768 — encounter not identified by the source |
| Arena adds | Gold Mask and Iron Mask, already fighting him on arrival |
| Below 50% | Faster movement, tighter combo links, shorter red-flash dash warning |
| Reward | Jagged Steel, a one-handed weapon |
The adds are the part that turns a clean attempt into a loss. Both masks aggro on you, and a hit from behind during a parry window reads as a failed parry rather than a separate hit. Clear them first, or position yourself so Jagged Steel's body is between you and them. The useful detail for repeat attempts is that the adds do not respawn when you run back from the bell, so a failed attempt still leaves the arena lighter.
Jagged Steel's move set is small and readable once you stop standing in front of him. Every attack below is either a guard-damage opportunity, a dodge check, or a punish window.
| Attack | What it looks like | Answer |
|---|---|---|
| Triple Slam | Raises the blade overhead and slams three times; sometimes skips to the final jump slam | Dodge sideways or through his legs. The recovery after the third slam is the largest punish in the fight; circle behind him. |
| Standard sword combos | Two to four horizontal or diagonal swings, often opened by a short jog with the blade shouldered | Parry each hit to drain guard. If the sequence is too long to read, hold block and back out so the later swings whiff. |
| Spinning slashes | A spin on the spot, sometimes travelling forward | Block the first two rotations, then parry the third. A clean parry interrupts the spin and leaves him staggered. |
| Blue-flash finisher | Three-hit combo with a blue flash on the last hit | Block or parry the first two, then parry the blue hit. It costs no Sha-Chi, drains a large amount of his guard and triggers Ghoststep behind him. |
| Red-flash strike | An unannounced red flash on a dash or leaping overhead | Cannot be blocked or parried. Dodge diagonally or to the side; a perfect dodge triggers Ghoststep and gives you the back. |
| Red-flash combo | Five blockable swings followed by a red-flash sixth hit | Block or parry the first five, then dodge the sixth as soon as the flash appears and punish the recovery. |
The bleed mechanic is the reason blocking is not a safe default here. Every hit you take, and every block that is not a perfect parry, adds to Soul's bleed bar. When it fills, Blood Loss triggers and removes a large slice of your maximum health. A long turtle session therefore ends with less health than a few clean parries would have cost you.
Clear the masks, then treat his guard as the real health bar. Your job is to keep enough Sha-Chi to punish, and to stop attacking one beat before you think you should.
The barrier blocks the path until the red threads are cut. Once they are down, take the stairs beside the barrier bell and walk through the opened curtain of threads.
Follow the stream-side canyon, pass the purple-robed corpse under the rock overhang, and continue through the waterfall mist into the wide stone riverbed. Rustblade Pavilion stands on the cliff ahead.
Gold Mask and Iron Mask are already fighting Jagged Steel when you arrive. They aggro on you and interrupt combos, so clear them first or keep the boss between you and them.
His three-hit combo ends on a blue flash. Block or parry the first two hits, then parry the blue one: it costs no Sha-Chi, drains his guard and triggers Ghoststep behind him.
The five-hit combo ends with a red-flash sixth strike. That one cannot be blocked or parried. Dodge sideways or through him as the flash appears, then punish the whiff.
When his guard breaks, use a full combo rather than one heavy hit. Below 50% he speeds up, so bait the overhead slam, sidestep it and punish from behind instead of trading in front.
Two setup details make the fight noticeably easier. First, pick up Sanguine Twin outside the arena near the ladder before you drop in. Its fast dual-wield attacks drain posture faster than the starting blade, and swapping between Sanguine and Sanguine Twin refills Sha-Chi when the yellow bar runs dry. Second, do not hold block through a full combo. Block the swings you cannot read, then parry the last one; the guard damage from a parry is worth more than the safety of the hold.
Below half health he accelerates. The red-flash dash telegraph gets shorter, and his combos link faster, so the safe pattern changes: stay at mid range, bait the jumping slam, sidestep it, and hit him from behind. Trading blows in front of him at this stage is how a good attempt turns into a Blood Loss death.
Beating him automatically opens the Jagged Steel weapon card. It is a one-handed blade with 240 damage and 124 status, built around Bleeding: hits fill a bleed gauge, and a full gauge triggers Blood Loss. It is excellent against living enemies and completely ineffective against Puppets, Golden Bodies and Phantom Bodies, which matters more later than it does in this arena.
If you want the full breakdown of the blade, its Lv.5–25 skills and the upgrade materials, see the Jagged Steel location and upgrade guide.
Source conflict: GamesRecon calls him "Jagged Steel, the Frenzied Blade" once and "the Frenzied Brute" everywhere else. The health bar and the boss list both use "the Frenzied Brute," so that is the name this page uses.
What the 69,768 HP value belongs to is not stated. It could be a later rematch or a second encounter, but the sources do not confirm either, so this page does not call it a phase two. Per-attack damage and the exact bleed threshold are also unconfirmed.
These are the five ways the fight goes wrong even when the route and the moves are known.
In Weeping Creek Valley during Chapter 1, Against the Flow. Cut the Red Thread Barrier, follow the stream-side canyon past the waterfall mist, and drop into the wide stone riverbed beneath Rustblade Pavilion. The nearest bell is Rustblade Pavilion, above the riverbed by the candle-covered cross.
The first encounter is listed at 8,280 HP at level 2. The same source also lists 69,768 at level 18, but does not say which encounter that value belongs to, so we do not attribute it to a second phase. Treat 8,280 as the fight you reach in Chapter 1.
Yes. A Gold Mask and an Iron Mask are already fighting him when you arrive. They aggro on you and interrupt combos, so clear them first or keep the boss between you and them. Dead adds do not respawn when you run back from the bell.
No. The red-flash strike and the red-flash sixth hit of his long combo cannot be blocked or parried. Dodge them. The blue flash at the end of his three-hit combo is the parry target.
The Jagged Steel one-handed weapon, with 240 damage and 124 status. The weapon card appears automatically after the fight. Bleed from the weapon does not work on Puppets, Golden Bodies or Phantom Bodies.
Every clean hit and every non-perfect block adds to Soul's bleed bar. When it fills, Blood Loss triggers and cuts a large chunk from your maximum health. Precise parries and clean dodges avoid the buildup; holding block does not.
Where the sources disagree, the page names the conflict rather than picking a number that looks cleaner.
Data is based on the current version of Phantom Blade Zero. Last updated . Spotted something out of date? Tell us with a screenshot and we will re-test it.
Keep going
The story-order list, the 24 optional fights, and why the count is 39, 50+ or 74.
What the blade does, the Lv.5–25 skills and what each upgrade tier needs.
The next fight in the valley: two health bars and a 15 m chain.
The block, parry and Ghoststep rules this fight tests.
Thirteen early weapons, their routes, and the order we would pick them in.